

How To Animate Cool Logo Effect In Maya
Logo animations are increasingly common these days. Betwixt smartphones and the general advancement of internet engineering science, logos are now encountered much more oftentimes in digital spaces, and this opens the door to visual effects such as animation that are not possible with physical products. Of form, the increasing popularity of logo animation means that more and more brands will need information technology to stay competitive. So learning how to animate a logo tin can be a valuable skill to accept your logo to the side by side level.
At the aforementioned time, animation software has too go more ubiquitous, streamlined and intuitive in order to back up this growing user base. And then regardless of how technical and daunting logo blitheness may sound, even beginners now have the power to create simple but effective animations.
To this end, I am going to walk y'all through the basics of logo animation from start to finish. As an example, I'll be working with a logo I made for my personal blog: Story Mode. While we'll exist using Adobe After Effects in this tutorial, most animation software contains like functionality and the fundamentals of how the software works volition utilize to any program though the particular names and menu options may differ.
How to breathing a logo with After Effects in vii steps
—
- Fix the logo file
- Import the logo into After Furnishings
- Prepare up the composition
- Breathing with keyframes
- Animate with shape layers
- Arrange your blitheness timing
- Export your animated logo
Footstep 1: Gear up the logo file
We'll actually begin our logo animation tutorial in Adobe Illustrator (or the equivalent logo design software that you lot ain). This is to brand sure that our logo file is ready up for animation.
Though animation software itself is raster based, logo source files should exist in vector format. This allows them to exist altered without sacrificing image quality (for example, scaling up a raster logo results in pixelation), and this will be useful subsequently on when working with shape layers.
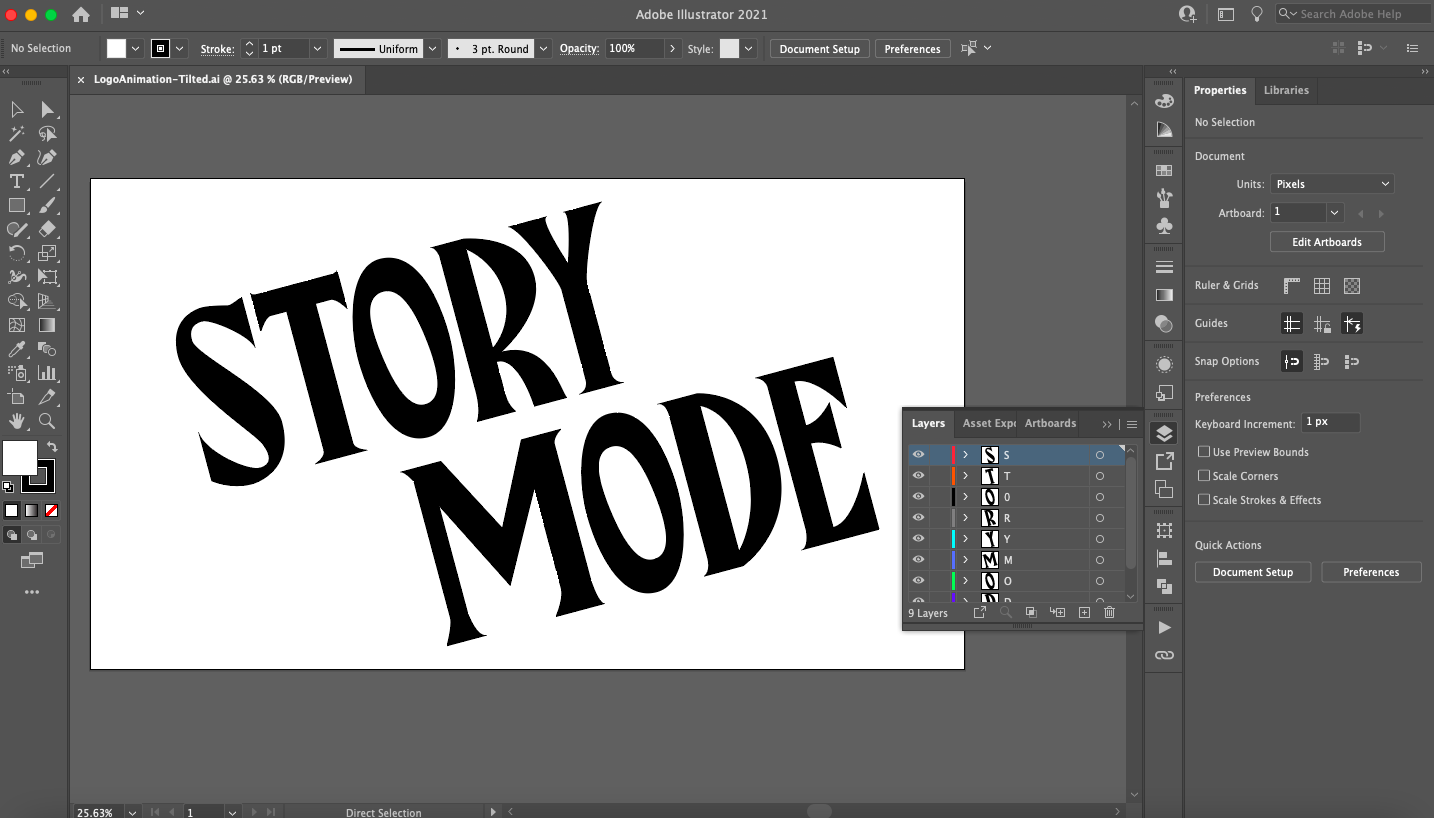
The logo should as well exist layered rather than grouped into a single object. This allows you to create more complex animations easily by animating separate parts of the logo. You tin can create new layers using theAdd New Layer push at the bottom of the Layers console, so re-create and paste your logo pieces into them.
Finally, equally animations are digital in nature, nosotros are as well working with RGB colors. If your Illustrator file is set to CMYK, you can change this by selecting your logo and navigating toEdit> Edit Colors> Convert to RGB.
Once you are ready, consign your logo as a fully layered vector file. Because After Effects file types are in the Adobe family unit of software, I am going to save the logo I made as an AI (Adobe Illustrator) file, simply at that place are a number of different vector file types to choose from if you lot are using a different software.
Step 2: Import the logo into After Effects
Open Later Effects. The interface may appear complicated at starting time glance, so let's break down the essentials:
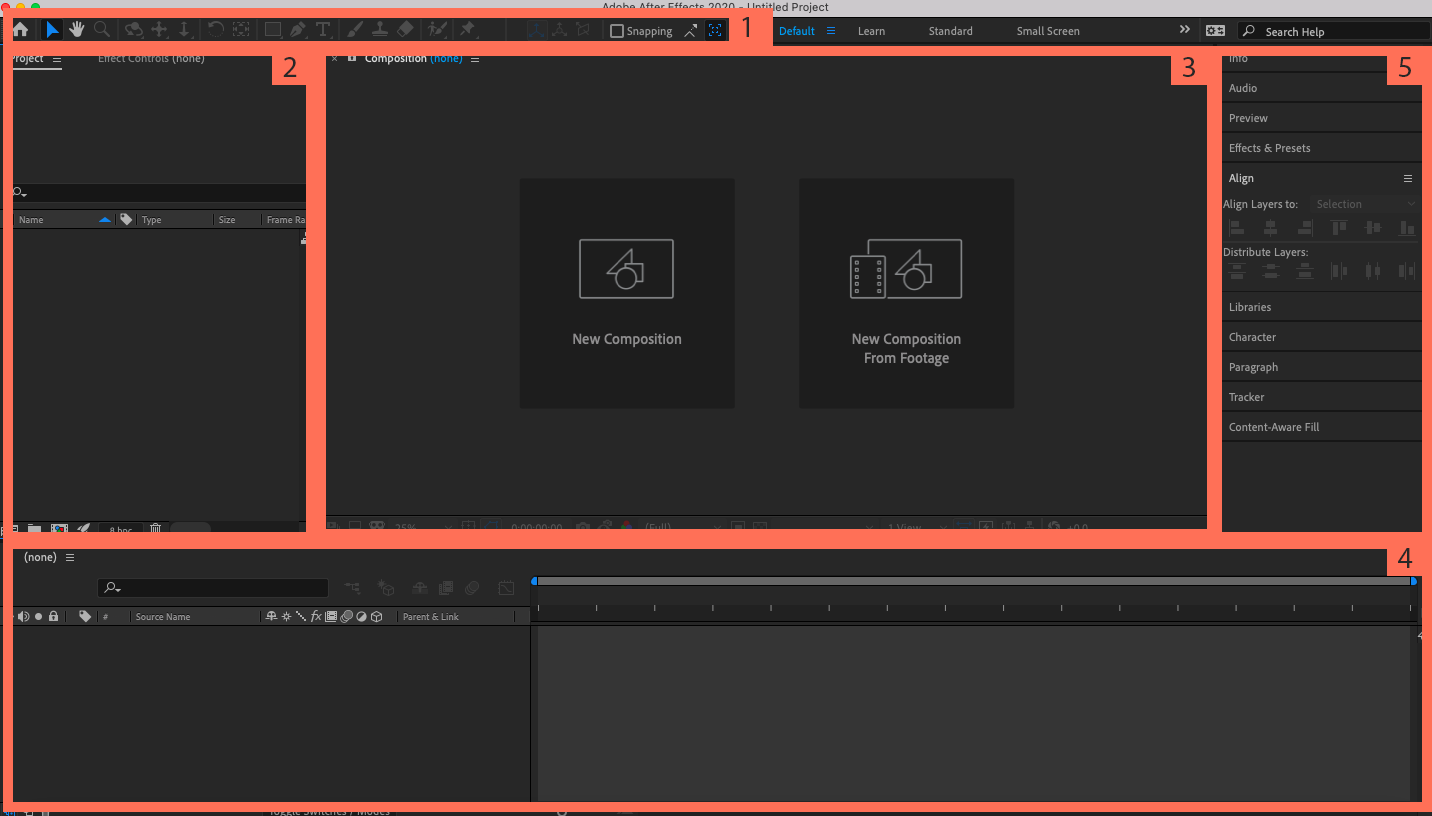
- Tool panel: This is where you can access bones graphics building tools such as the pen tool, type tool, etc.
- Project panel: This is where you manage and organize media files for your overall projection.
- Limerick window: This is the video preview window in which y'all can view the animation for the current composition (often referred to as a comp) that you are working on. Comps are essentially scenes that each have their own separate animation timelines. We'll discuss compositions in more depth in the adjacent section.
- Timeline: This is where you will build your animation. Information technology consists of both the literal timeline on the correct (where yous will fix up blitheness events to trigger on a time-based graph) and the comp area on the left (where you will layer and edit the attributes of your media avails).
- Control panel: This is where you lot can admission various support functions such as media information, paragraph and alignment options, and the prepare-made blitheness and visual effects libraries built into After Effects.
If yous are unsure about whatever tool or button, hovering over information technology with your mouse will provide y'all with a clarification.
To import your logo file, simply drag and drib it into the Project panel or navigate toFile >Import >File. Nether the dialogue box that follows, choose to import the media equallyFootage and Merged Layers.
Step 3: Ready composition
A limerick (comp) is a container that allows you to layer, edit and apply animations to media files. A larger production, such equally a picture, will contain multiple comps that are organized in the project panel. So you lot can think of comps equally a single scene within that picture show, and each comp will accept their own dissever timeline. In our case, a logo animation that is less than 5 seconds long needs very few comps.
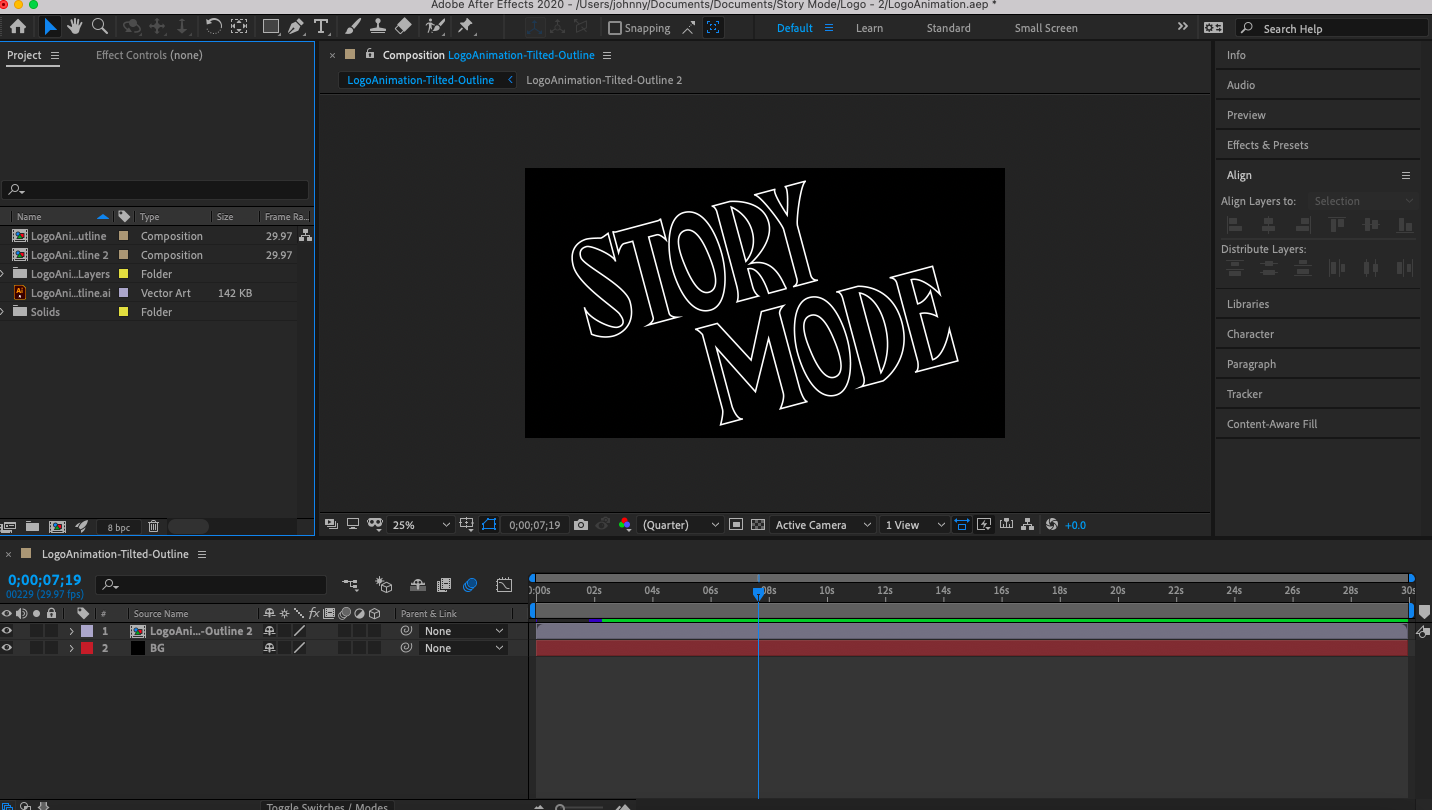
Let's start with a simple background. Right click in the comp panel and choose New >Solid. Considering my logo is white, I went with a black solid, only you may choose whatever color you want. In the post-obit window, proper noun the solid ("BG" in my case) and click theMake Comp Size button and selectOK. Now drag your logo file from the project panel into the timeline console and you should see your logo previewed in the comp window. If not, make sure you rearrange your layers by dragging the background solid underneath the logo file.
Right click the logo file in the comp panel and choose Create > Convert to Layered Comp. This will plough your logo file into another comp (you will run into the icon has inverse). Double clicking the logo file at present volition open up a new tab and accept you into this new comp containing all of the separate layers you lot had gear up in Illustrator. You can encounter now how comps work: they are substantially like nested folders.
If you lot wanted, you could convert each of these layers into their own comps by right-clicking and selectingPre-compose. This would requite that layer a split blitheness timeline nested within the previous comp. And if you wanted to breathing the entire logo at once, you lot would use the timeline associated with the primary comp.
With that out of the fashion, permit's get into how these timelines piece of work for animation.
Stride 4: Animate with keyframes
The mode that After Effects (and most animation software) works is through keyframes. Keyframes are essentially markers that you can gear up along the timeline to identify when starting states and ending states for your blitheness should occur.
For example, let's begin with a very simple blitheness: a fade-in. There are dissimilar attributes fastened to an object, and attributes changed over a ready amount of time is substantially what an animation is. To encounter these attributes, click the expand icon side by side to both the logo comp and the subsequent Transform holding.
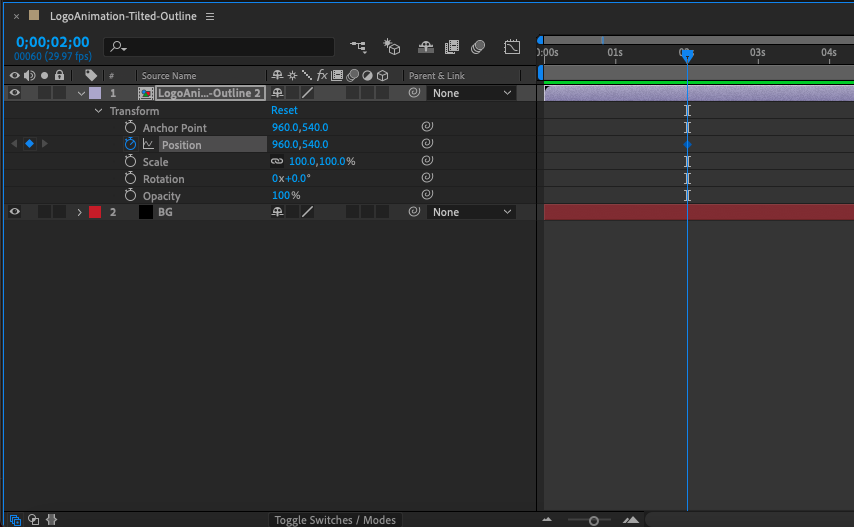
For a fading animation, yous want to work with the attribute that measures the visibility of an object: Opacity. The opacity is set to 100% because the logo is completely visible by default.
Click the stopwatch icon next to Opacity, and you volition see a diamond announced wherever your playhead marking (the drabble blue line crossing the timeline) has been set up. This is a keyframe, basically a snapshot of the current value of the specified attribute. Move the keyframe by clicking and dragging it out to the ii second mark on the timeline. Elevate the playhead dorsum to the 0 second mark, so create some other keyframe and set the Opacity to 0%. Press the spacebar to preview the blitheness in the comp window.
You lot will see that y'all take created a gradual fade-in animation by changing the Opacity from 0% to 100% over the class of 2 seconds with just 2 keyframes. This is effectively how all animation is done in After Furnishings. You create a starting keyframe and an ending keyframe at unlike intervals along the timeline and After Furnishings automatically calculates the necessary frame transitions to get from bespeak A to signal B (traditionally called inbetweens in the blitheness biz).
You tin see that there are a number of attributes that yous tin piece of work with under the Transform property which we will explicate briefly here. Feel gratis to experiment with keyframing and changing each of these to get a feel for their blitheness possibilities:
- Position: This attribute describes the position of the logo in X,Y space on the comp screen and allows y'all to animate linear motility.
- Scale: This aspect describes the size of the logo (equally a percentage relative to the total size of the source file) and allows you to create growing or shrinking animations.
- Rotation: This aspect describes the orientation in degrees and allows you to create spinning animations.
Pro tip: When it comes to logo animation, it makes sense to work in reverse (as we did with the fade-in) since the animation is supposed to end on the finished, complete logo. This means you'll need to create keyframes before you change anything and so that you will take snapshots of the attribute values in their default state. You can then move those keyframes out to your intended end betoken on the timeline (however long yous desire the blitheness to last) and make new keyframes for changes at the start of the timeline.
Step 5: Animate your logo with shape layers
Now let'southward get into some more interesting animation techniques through shape layers. Shape layers are objects that incorporate pathing information such equally ballast points and connecting lines (similar to those in vector programs), and manipulating these opens the door to a whole host of animation possibilities beyond the Transform property.
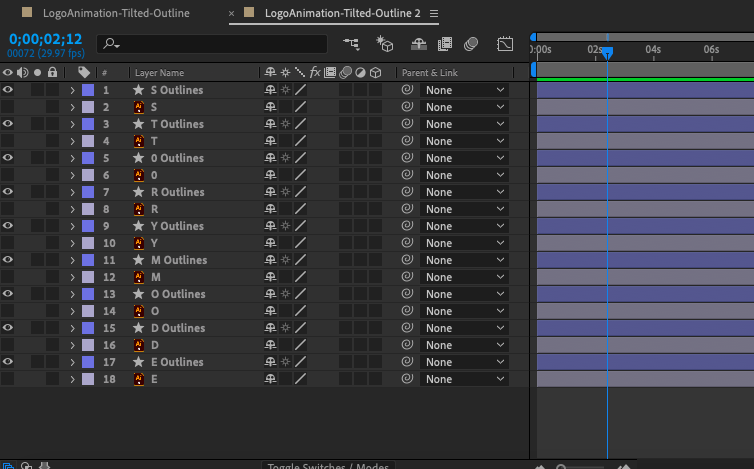
First, we're going to convert the logo into a shape layer. In the layered comp console (the layers created from stride 3), select all of your layers, right click and chooseCreate >Create Shapes from Vector Layer. You volition see each layer is duplicated with a star next to it—this is a shape layer. Nested underneath the shape layer, you lot will find the Content belongings in addition to the Transform holding. To the right of the Content property, you will also see theAdd push which will permit you to select even more attributes to breathing.
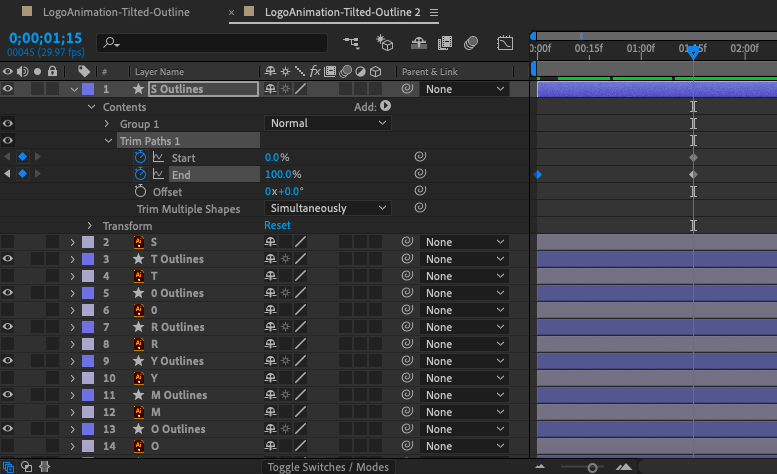
For my logo, I went with a pretty common and useful blitheness using the Trim Paths property. To do this, I added Trim Paths with theAdd push to the shape layers for each letter, fix the Terminate attribute keyframe to 0% at the first of the timeline and 100% near 1 2nd later. Every bit you lot tin see, this makes the outline of the letters appear fatigued by an invisible hand in real time.
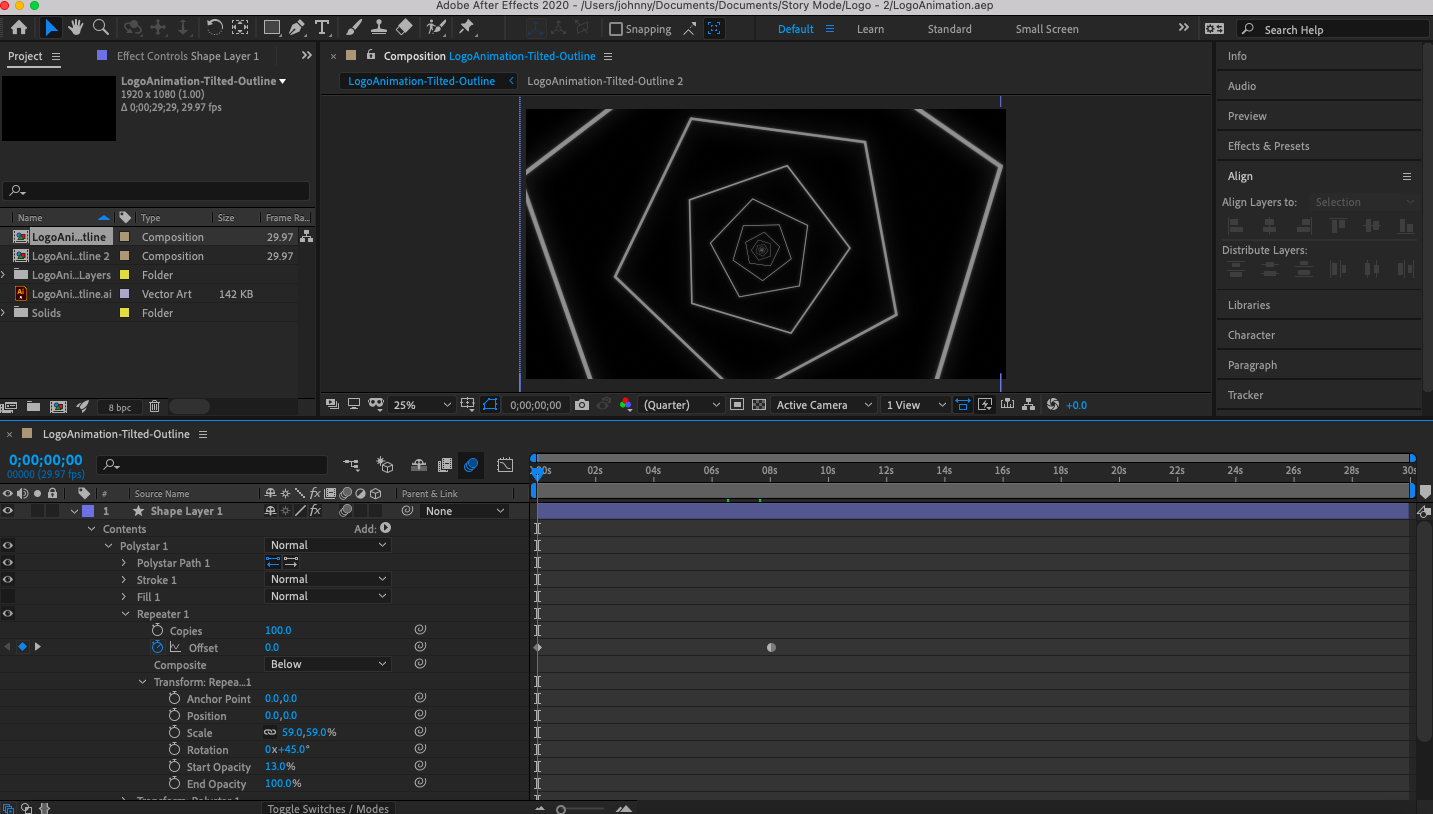
In addition, I wanted to incorporate some emphasis blitheness to the background. Since I am working in black and white, I chose a looping tunnel effect reminiscent of the Twilight Zone. To practise this, I used the polygon tool in the toolbar to draw a shape in the center of my comp, creating a new shape layer.
And then I added a Repeater property, centered the position and increased the number of copies. This duplicates the shape to create a seemingly space tunnel. Adjusting the scale increases the space in between each re-create, and changing the rotation orients the copies in different directions for visual interest.
Finally, to breathing this, I made an Offset keyframe of 0 at the start of the timeline and prepare information technology to a negative value after on in the timeline.
You are probably getting the idea that there are a lot of options for shape layers. This is true: there are total courses online dedicated to the subject and y'all should dedicate fourth dimension to experimenting, practicing and learning.
I likewise can't tell y'all which animation mode will be right for your logo or what specific blitheness tools you will need to achieve that style. I tin can, however, requite you advice on how to discover this for yourself. Look upwards inspiration from other animated logos such as your competitors, brands yous admire and/or on a site like Pinterest or Dribbble—but as you did when you created the logo in the first place.
You will find that once yous showtime analyzing these with your newfound knowledge of how to breathing a logo that many are based around uncomplicated manipulations of shapes and transforms (even those that accept clearly layered on advanced, stylized furnishings). In one case y'all find a few that you like, you can work backwards in After Effects to try to reverse engineer these animations for practice.
Step half-dozen: Accommodate your animation timing
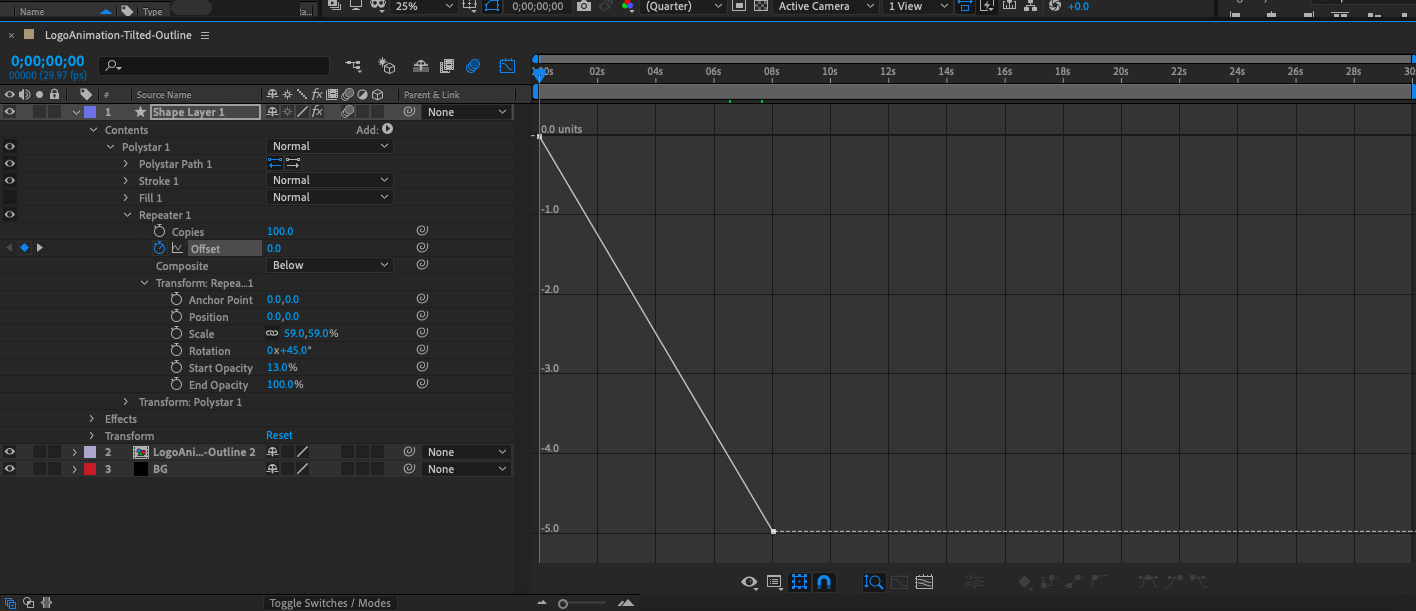
Permit'southward have a moment to talk almost timing, which describes the pacing of blitheness frames throughout an blitheness. You tin come across a visual representation of timing by navigating to theGraph Editor. To practice so, click the Graph icon (labeledGraph Editor if you hover over it) nigh the acme of the timeline panel, and this will change the timeline into a linear graph.
If you click on one of your keyframe attributes, you will encounter a straight line from one keyframe to the next. Right at present, because we've simply been creating starting and catastrophe indicate keyframes, we've left information technology upwardly to After Effects to calculate the timing. With no direction, After Effects paces each animation frame evenly, resulting in a perfectly direct line.
However, varying the timing in a purposeful style is what gives animation a sense of realism. For instance, in a bouncing ball animation, the brawl moves slower at the height of its bounciness and faster when it is closer to the ground because of momentum and gravity. In other words, it does not move at the same speed throughout the animation, and if it did, this would stand out as robotic.

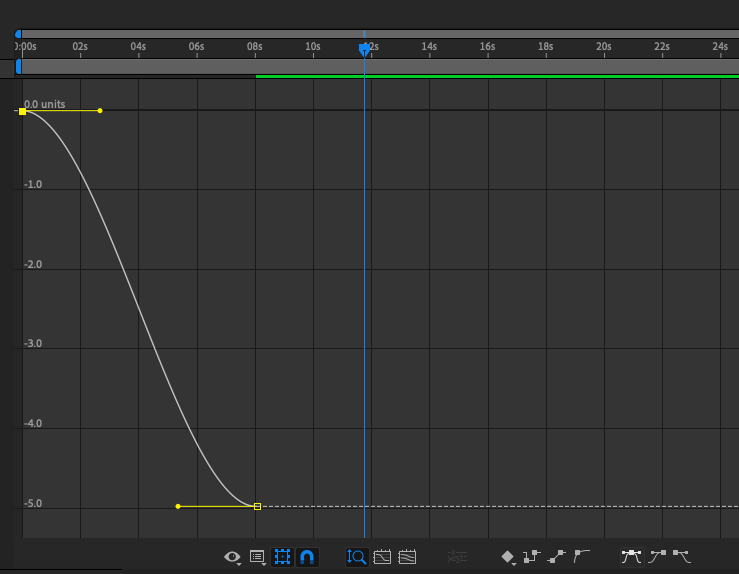
The graph editor allows y'all to suit the timing on your own animation using what are chosen bezier handles to transform the graph line into a bend. Towards the bottom correct of the Graph Editor, you will see a number of icons of square points attached to lines—these are bezier tools.
Click on one of your keyframes and hover over the bezier tools until yous find the one labeledConvert keyframes to Auto Bezier. When you click on this you lot will encounter a yellowish handle appear in the graph. Dragging this handle around will cause the line to curve, and this will modify the timing of your animation. Where the bend is more pronounced, the frames volition play faster, and where the curve is smoother, the frames volition play slower.
To really understand the nuances of how your own timing should exist customized takes animation experience, and that'due south why adjusting bezier curves by hand is a more avant-garde topic. For the purposes of this beginner tutorial, I recommend using the Easy Ease bezier tool (which applies an automated curve to your selected keyframe) for all of your blitheness timing. You can employEasy Ease to a keyframe outside of the Graph Editor by selecting a keyframe and right click.
Step seven: Export your blithe logo
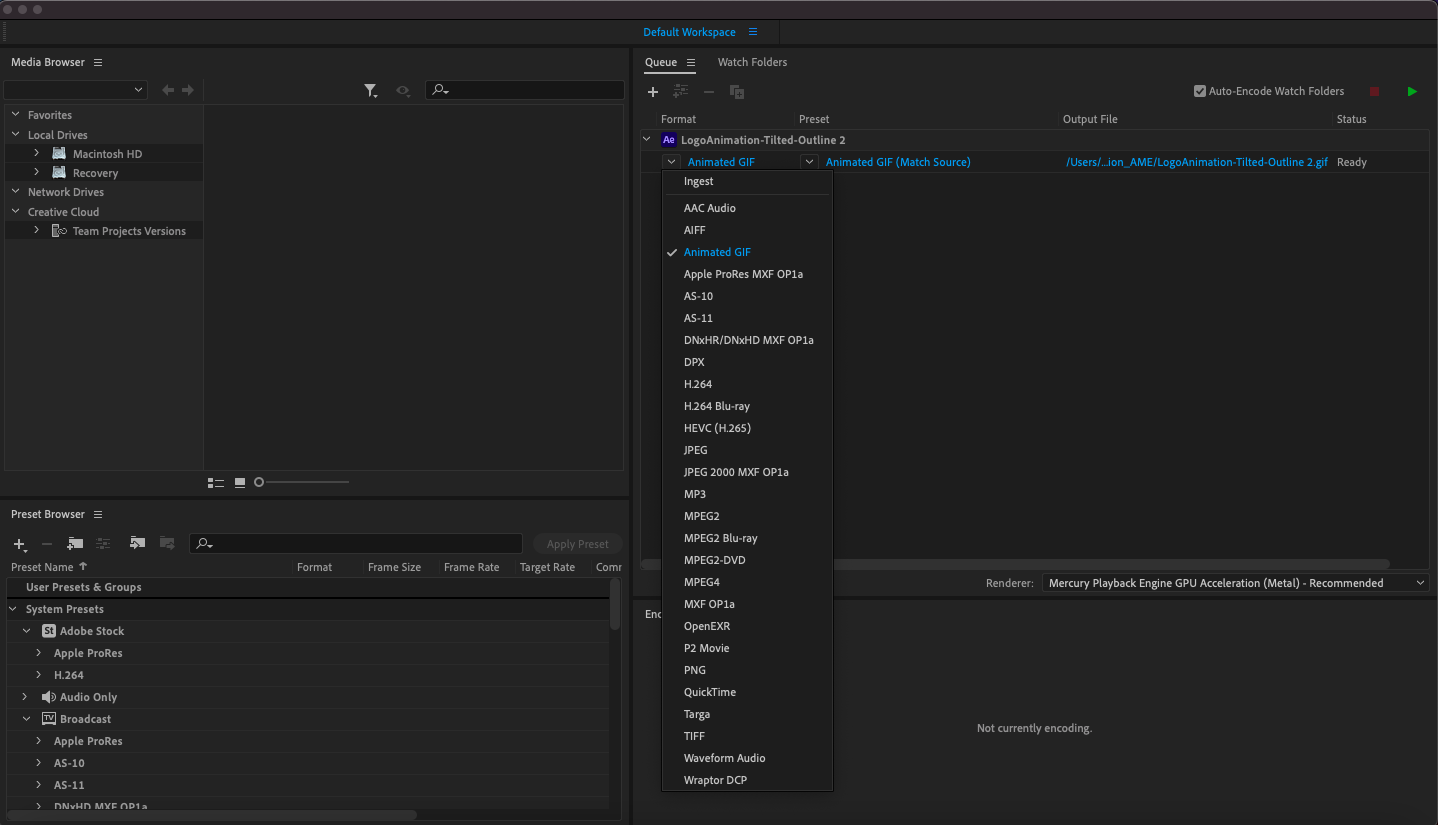
When you're fix to consign your finished animated logo, become to File >Export >Add to Adobe Media Encoder queue. Afterward Effects will export as an mp4 file by default, which is fine for video. Since we want to create a shareable image file of our logo animation, we volition be exporting as an animated GIF. In the Media Encoder window, click the arrow side by side to the highlighted blue line of text nether the word Format and cullAnimated GIF. You tin can also gear up the destination binder of your finished file past clicking the blue text under the words Output File.
Double click the highlighted blue text nether the Preset to bring up the Consign Settings window. There are a few options you lot desire to pay attention to in lodge to bring the file size down: Quality (I put mine at 20), Frame Rate (I set mine to 10, though a higher frame rate (fps) is recommended for video) and the duration, which is the blue bar beneath the preview (I cropped mine to 4 seconds). SelectOK to close this window.
In one case you're finished, select the dark-green Play icon in the upper right corner of the Media Encoder and your file volition return to your preferred destination binder. And there y'all have it: a finished logo animation!
Bring your brand to life through a logo animation
—
Logo animation is more than merely a pop trend that brands are pressured to go along up with. There is as well an undeniable magic to animative a logo, and it is an splendid way of creating a moment of visual delight for everyone who interacts with your brand. And fortunately, animation software has evolved and then that almost anyone regardless of skill can infuse a petty of that magic into their own logo.
With that said, while this tutorial is designed to starting time you off with the basics of how to animate a logo, it takes no small amount of trial and error, exercise and experimentation to get anything above a bones animation. If you lot desire a logo blitheness that is truly special, a professional logo animator is well worth the investment.
Want to go the perfect animated logo for your business?
Work with our talented designers to arrive happen.
Source: https://99designs.com/blog/logo-branding/how-to-animate-a-logo/
Posted by: euresiging.blogspot.com
0 Response to "How To Animate Cool Logo Effect In Maya"
Post a Comment